Free US Shipping on orders over $80

How To Create Cross Stitch Patterns In FlossCross
Cross stitching is new for me. I’m multi-craftual—knitting, crochet, weaving, needlepoint, embroidery. At this point, I’ve tried almost all of them, and have dozens of different projects in progress across different crafts tucked around my house. (“Mama, when are you going to finish this one?” is a common refrain from my 4-year-old.) But the first time I ever cross stitched was with our Zollie Beginner Cross Stitch Kit that we created with The Far Woods, and I fell for it. Hard.
Cross stitching is like painting with yarn, but without the mess, and the ability to plan ahead for exactly where you want each stitch and color to go. And even if you’re very new to cross stitch, you can start creating your own designs. In this blog post, I’m going to share how I collaborated with my mother to translate her illustrations into the new cross stitch kits that we launched this week, Winter and Spring.

Step One: Find or create your illustrations.
It goes without saying but I’ll say it anyway: you can’t take other people’s artwork to turn into cross stitch projects without their permission. Create your own original illustrations, collaborate with a friend, or use artwork with a Creative Commons license.
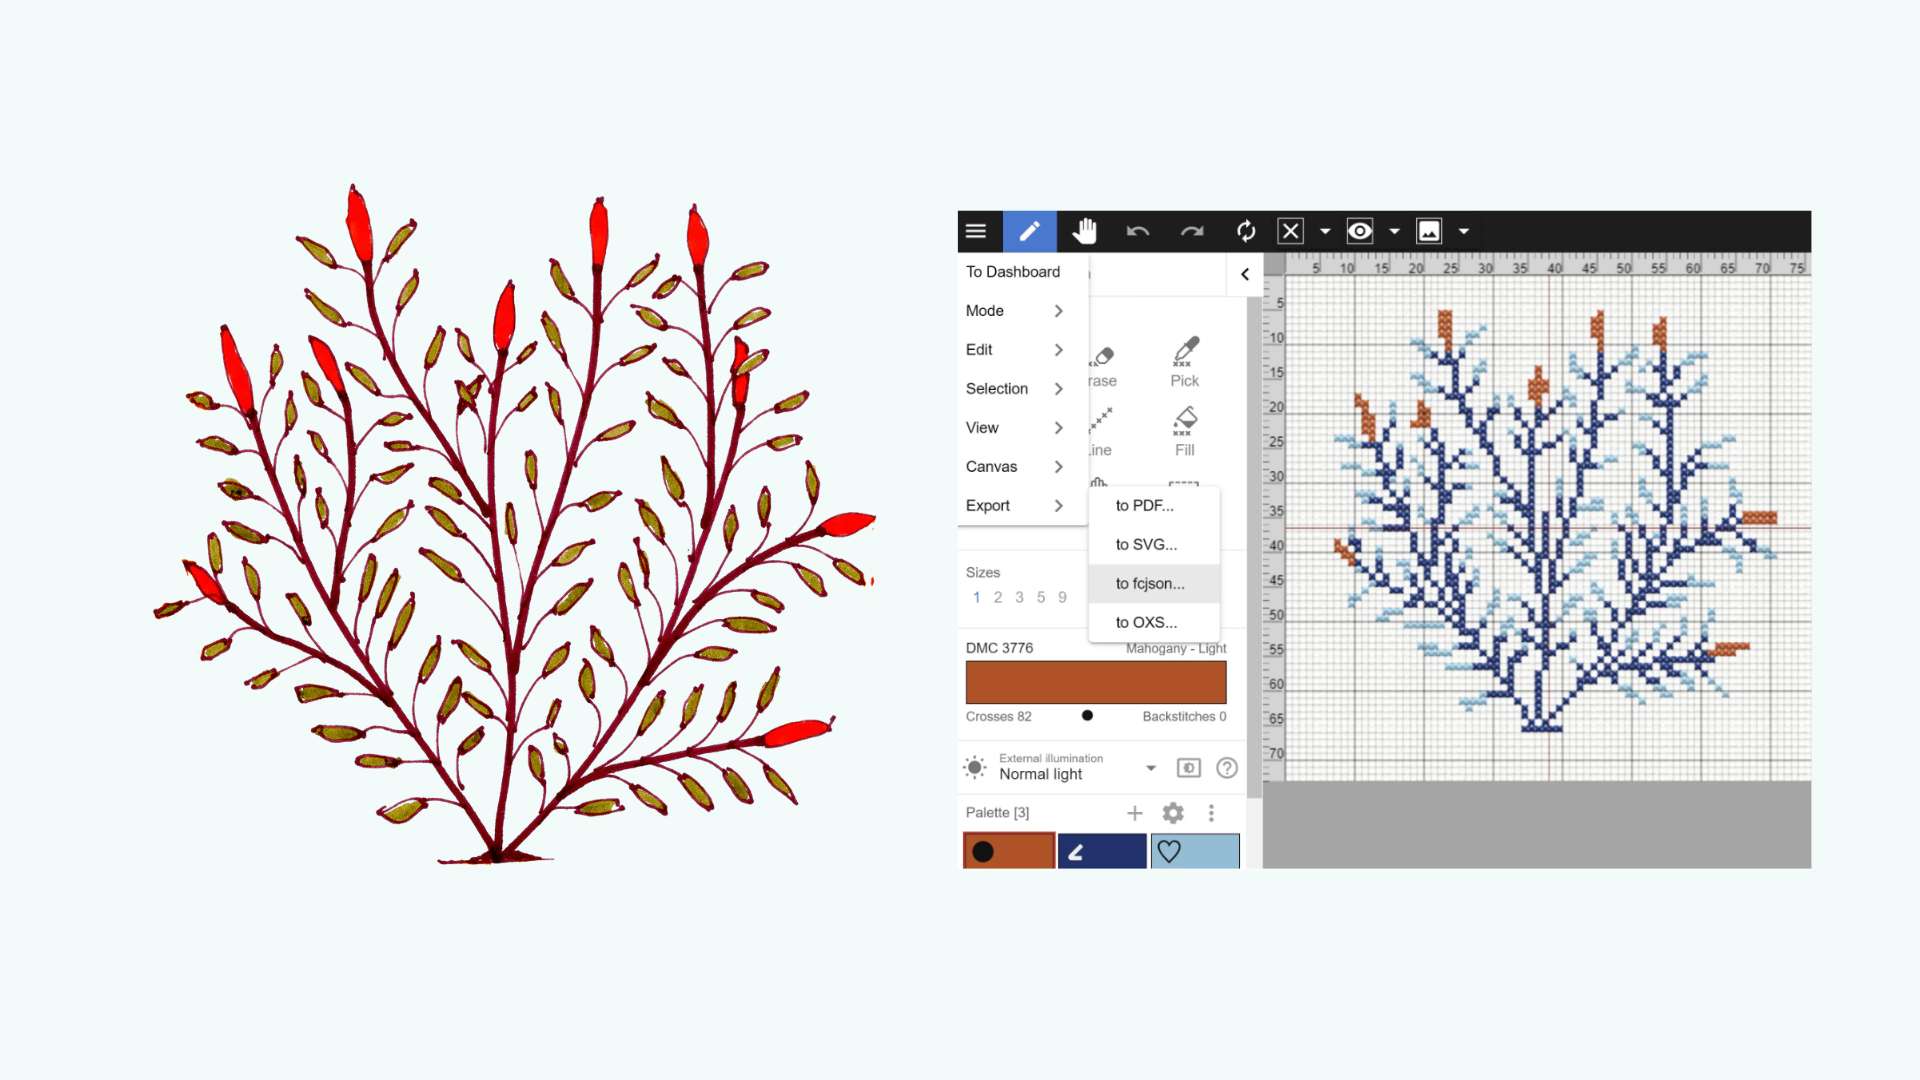
My mother Pamina Ewing is a photographer, and at different parts of her life has also experimented with illustration using markers. I came across some botanical illustrations she made several decades ago, and was drawn to the way she used blocks of color and simple line-work and curious how it could translate to my new obsession, cross stitch. So I asked if I could try turning her drawings into cross stitch patterns, and she agreed.

Step Two: Import your scanned illustrations into Flosscross
I took scans of her illustrations, and used Adobe Photoshop to crop out the part of the illustrations I wanted to turn into cross stitch. Then I opened an account with FlossCross. FlossCross is a fabulous, free resource that lets you create cross stitch designs and export them into finished products.
In your first slot, click “From Image” and then import your illustration.

Step Three:
Click Continue, and select the size of your chart. This is a tricky part, and requires some thinking. The larger your design, the more defined and less pixelated your project will be. The larger your design, the bigger the piece of Aida fabric you need, and the longer it will take to finish your project.

Step Four:
Click continue, and select the number of colors you wish to use. You’ll be able to reduce them in the next step, so just make sure that you can see all of the colors you wish to have in your final project here.

Step Five:
Reducing colors is an important step! Of course, the more colors you have in the final design, the more colors of yarn you’ll need for your project. I chose to reduce it to 5 colors here, knowing that I would narrow it down to 3 colors in the final editing process. Keep in mind that when you import an illustration, FlossCross is including a background color (here, it is white). In the final editing process, you will remove these white stitches from your design.

Step Six:
Now we’re on to cleaning up and editing! There are a number of things to do here, and I’m demonstrating each of them in this video.
- First, I further reduced the number of colors by replacing all of the olive green with the yellow green. Then I deleted the olive green from the design.
- Then I deleted the white background stitches from the design.
- Then I started cleaning up the pixels where the illustration didn’t import fully with the Paint tool. You’ll only see me doing a bit of this, as there was quite a lot to clean up with this illustration!
- Then I showed how to use the erase tool to further clean up the pixels.
- Then I showed how to replace the colors of the illustrations with the new colors I’d like my pattern to have. Note that in FlossCross there are only options to choose from DMC embroidery thread, so I chose the colors that are closest to Array Wool, which is what I used for this project.
Step Seven:
First export the fcjson file. Don’t forget this step! If you ever want to come back in to make any edits to your project, you will need to import this file.

Then you can export your PDF pattern. This video shows the different parts of the pattern you’ll see in your exported PDF pattern from FlossCross.
Step Eight:
Stitch! This, of course, is the best part. If you already know how to cross stitch, simply select your yarn colors and get started. If you need yarn for your project, we recommend Array Wool, our US-made yarn available in a large variety of colors. You can read more about the beauty of stitching with Array here.
If you’re new to cross stitch, we recommend starting with our Beginner Cross Stitch Kit with The Far Woods, which will take you step-by-step through everything you need to get started on your cross stitching journey. Enjoy!
Palette Scout
Stay in the loop
Be the first to hear about new color tools, artist collabs, sales, and more.
Contact
617-390-6835


